.png)

- Remove the current class from the content27_link item as Webflow's native current state will be automatically applied.
- To add interactions that automatically expand and collapse sections in the table of contents, select the content27_h-trigger element, add an element trigger, and choose Mouse click (tap).
- For the first click, select the custom animation Content 28 table of contents [Expand], and for the second click, select the custom animation Content 28 table of contents [Collapse].
- In the Trigger Settings, deselect all checkboxes other than Desktop and above. This disables the interaction on tablet and below to prevent scrolling bugs.
Introduction
Webflow is more than just a website builder; it’s a creative playground for designers, marketers, and entrepreneurs. But what if you could take your Webflow site to the next level by automating tasks, streamlining workflows, and connecting it with other tools? That’s where Zapier comes in. This integration empowers users to connect Webflow with thousands of apps, enabling seamless data transfer, automated tasks, and enhanced productivity. From experience, I know how tiring it is sometimes certain tasks need to be manually repeated. By leveraging the power of Zapier, Webflow users can automate repetitive tasks, manage data more efficiently, and focus on creative and strategic aspects of their projects.
Understanding Webflow: A Brief Overview
Webflow is a web design and development platform that allows users to build responsive websites visually. It combines the flexibility of front-end coding with the ease of a drag-and-drop interface, making it accessible to both seasoned developers and design novices. Webflow's powerful CMS (Content Management System) and e-commerce capabilities enable users to create dynamic, interactive, and high-performing websites without writing a single line of code.
What is Zapier and How Does It Work?
Zapier is a leading automation tool that connects different applications to automate workflows. With over 6,000+ apps supported, including popular ones like Google Sheets, Slack, and Mailchimp, Zapier allows users to create "Zaps" — automated workflows that perform specific actions when triggered by certain events. By connecting Webflow with Zapier, users can automate numerous tasks, such as updating databases, sending notifications, and managing customer information, saving valuable time and reducing the risk of manual errors.
The Power of Integration: Why Combine Webflow and Zapier?
Integrating Webflow with Zapier opens a world of possibilities for automating web development processes. This powerful combination allows users to:
- Automate repetitive tasks: Save time by automating tasks like form submissions, data entry, and content updates
- Enhance productivity: Focus on creative and strategic aspects of your projects instead of getting bogged down by routine tasks.
- Seamlessly connect apps: Integrate Webflow with other tools and platforms to create a cohesive digital ecosystem.
- Improve data accuracy: Reduce manual errors and ensure consistent data across multiple platforms.
Connecting Webflow with Zapier: Step-by-Step Guide
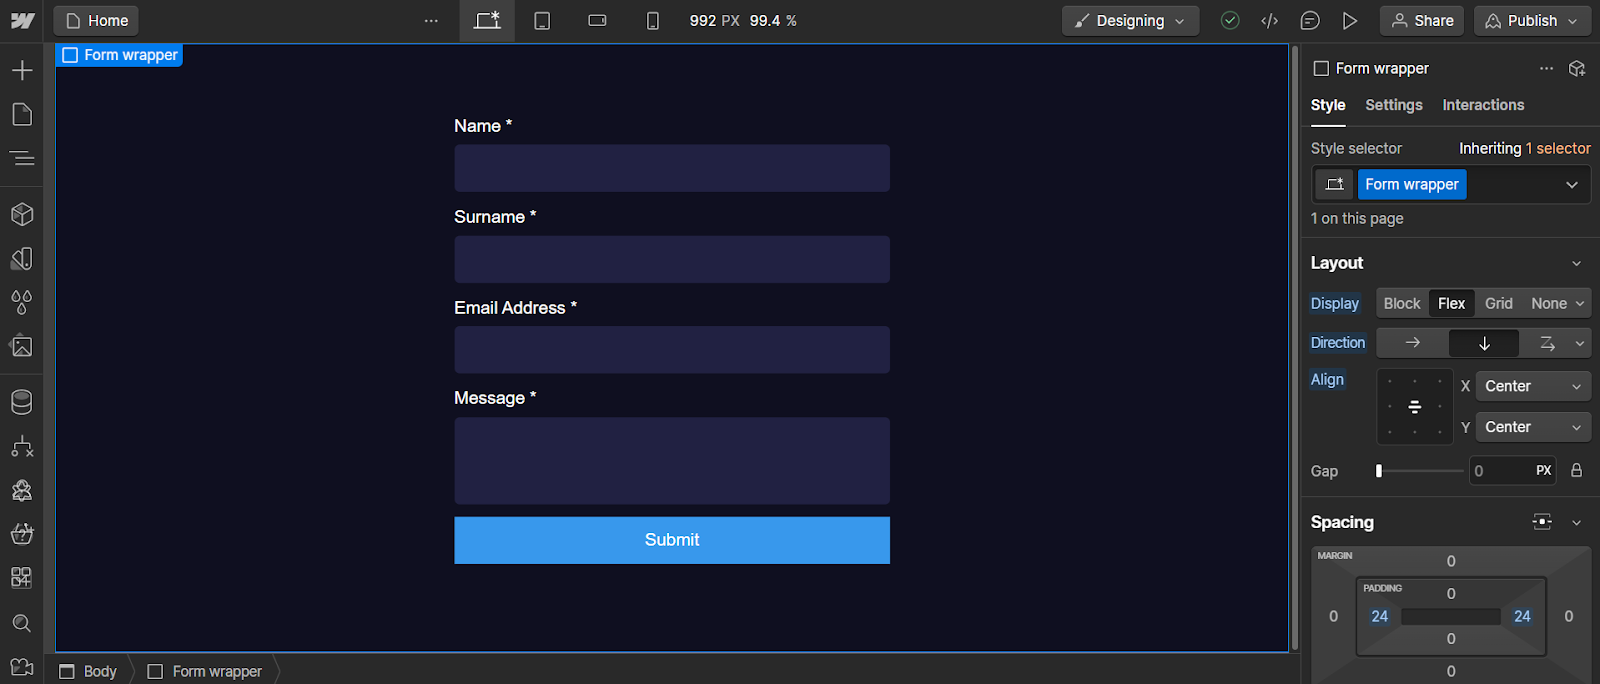
1. Setting Up Your Webflow Account: Before integrating Webflow with Zapier, ensure you have an active Webflow account. If you're new to Webflow, sign up and familiarize yourself with its interface and features. Create your first project, design your website, and set up the CMS and e-commerce functionalities as needed. In my case, I created a form, where the visitors leave their contact details. After leaving their information, they get an email that will have a link to a downloadable PDF. (For this to work, the PDF must already be placed in Assets, and we must know the link to this file)
2. Creating a Zapier Account: Next, you'll need a Zapier account. Sign up on Zapier's website, and explore the platform's dashboard. Familiarize yourself with the concepts of Zaps, triggers, and actions. Zapier offers a free plan with limited features, as well as premium plans with advanced functionalities, depending on your needs.
3. Log in to Zapier: Access your Zapier account and navigate to the dashboard.
4. Create a new Zap: Click on the "Make a Zap" button to start creating a new Zap.

5. Select a trigger app: Choose Webflow as the trigger app. This means that the workflow will start with an event in Webflow.

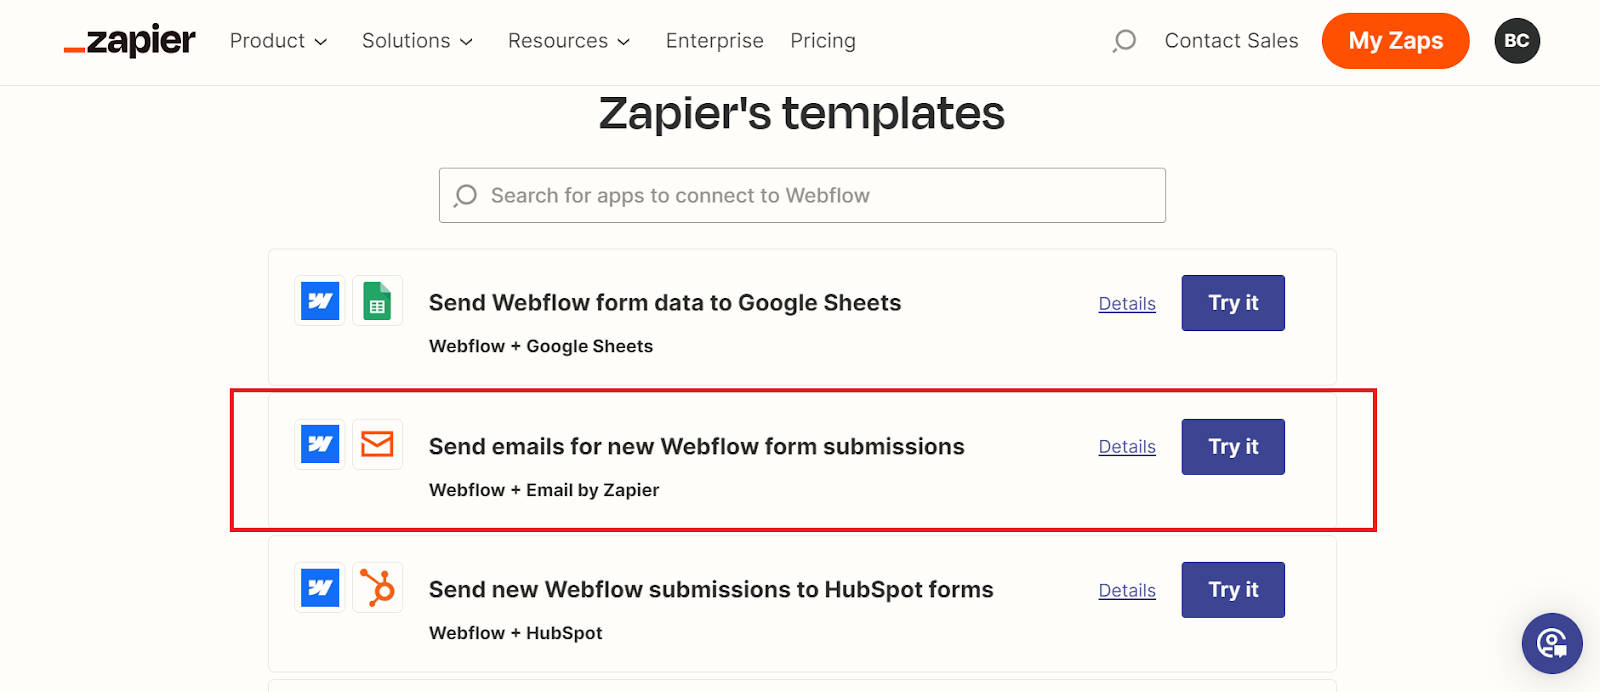
6. Choose a trigger event: Select the specific event that will trigger the workflow, such as a new form submission or a new CMS item. In my case, it is “Send emails for new Webflow form submissions”.
7. Connect your Webflow account: Follow the prompts to connect your Webflow account to Zapier. You may need to log in and authorize Zapier to access your Webflow data.
8. Set up the trigger: Configure the trigger by specifying the website, form, or collection that will initiate the workflow.

9. Choose an action app: Select the app where the action will occur, such as Google Sheets, Slack, or Mailchimp. In my case “Email by Zapier”.
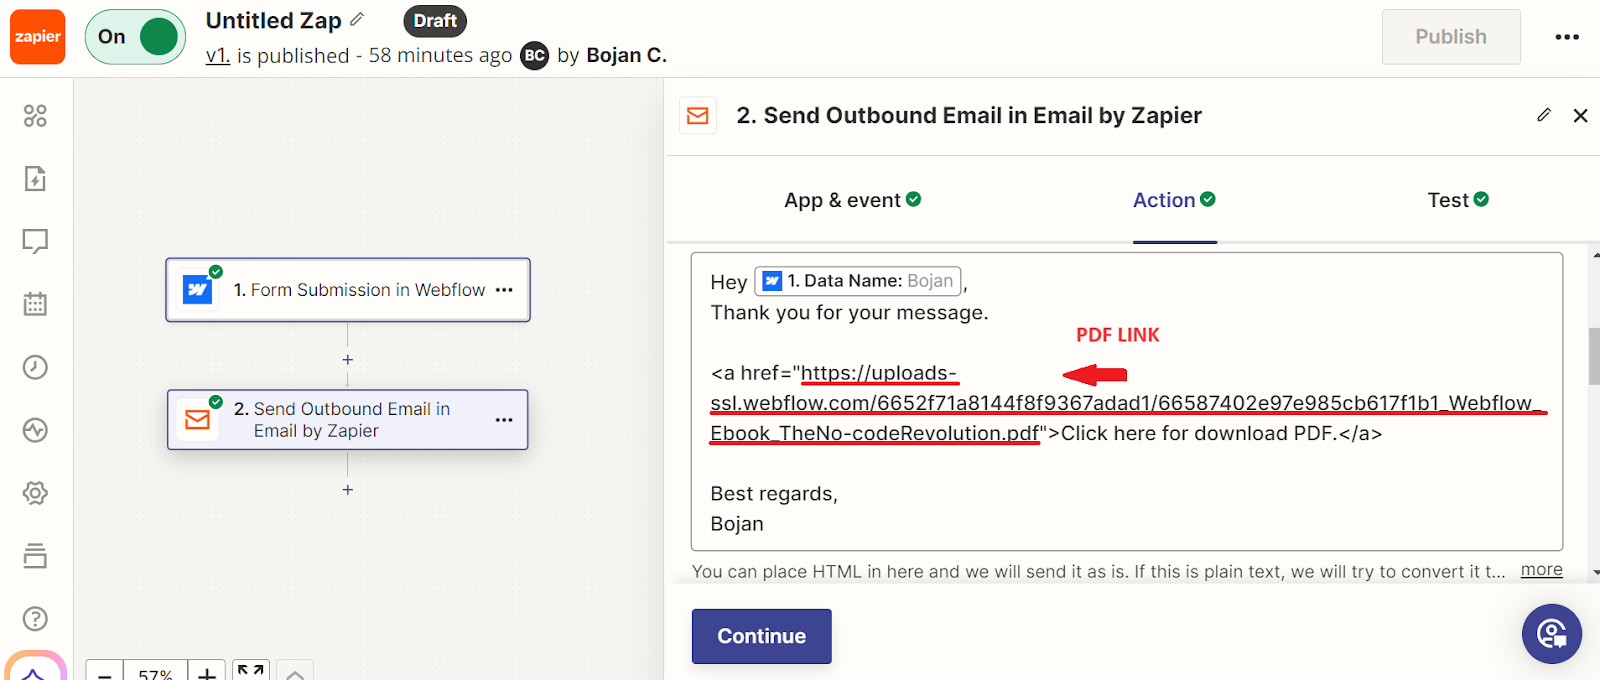
10. Configure the action: Specify the details of the action, such as the spreadsheet to update, the channel to send a message to, or the mailing list to update. This is the most important step. In my case, in the field “To”, I put the name of my Text Field from Webflow (Email)

PDF link must be copied from here:
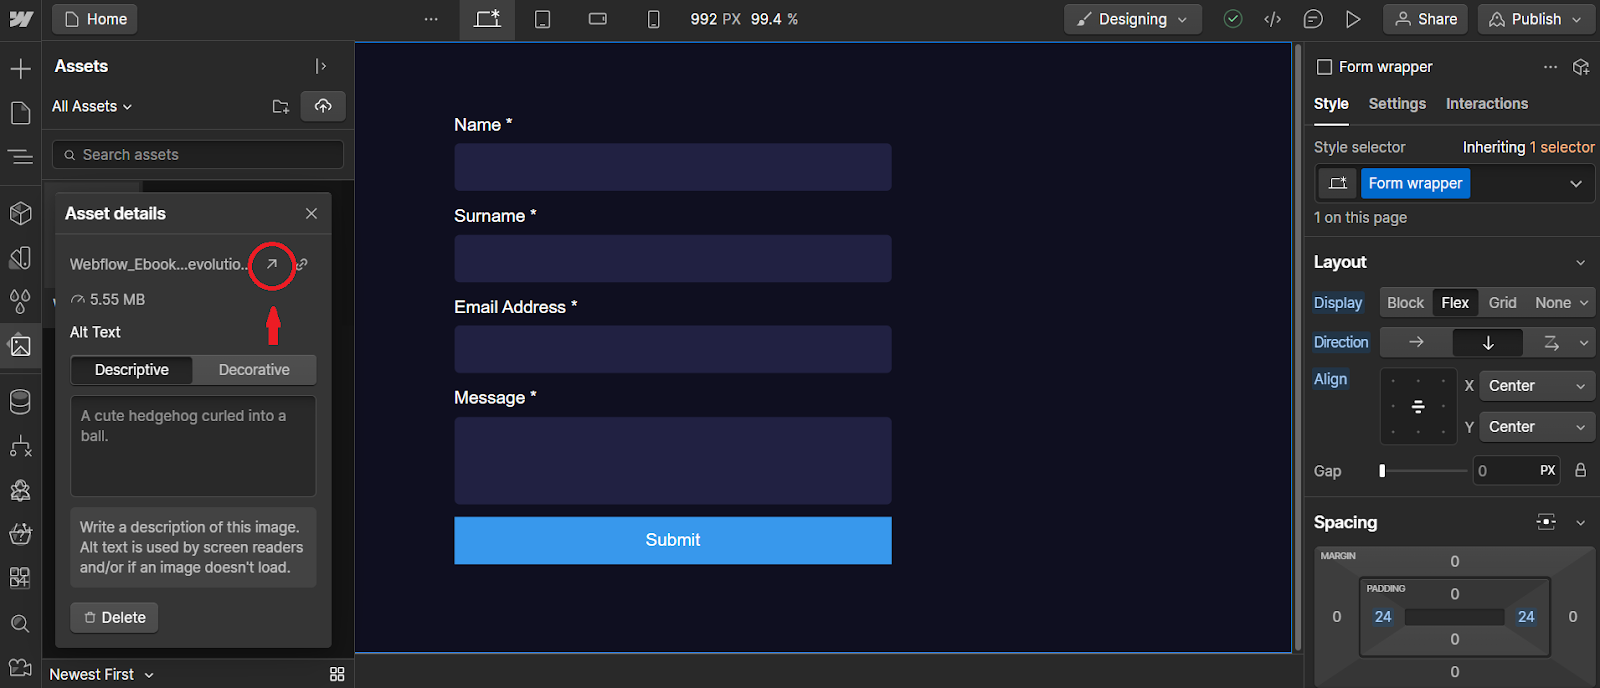
After that, we must paste this PDF link into our <a> tag.
11. Test the Zap: Run a test to ensure the Zap works as expected. Zapier will simulate the trigger event and act.
12. Activate the Zap: Once you're satisfied with the setup, turn on the Zap to start automating your workflow and press publish.
If we've set this all up and the site visitors have entered all their information, they should get an automated message like this:

Popular Webflow-Zapier Workflows
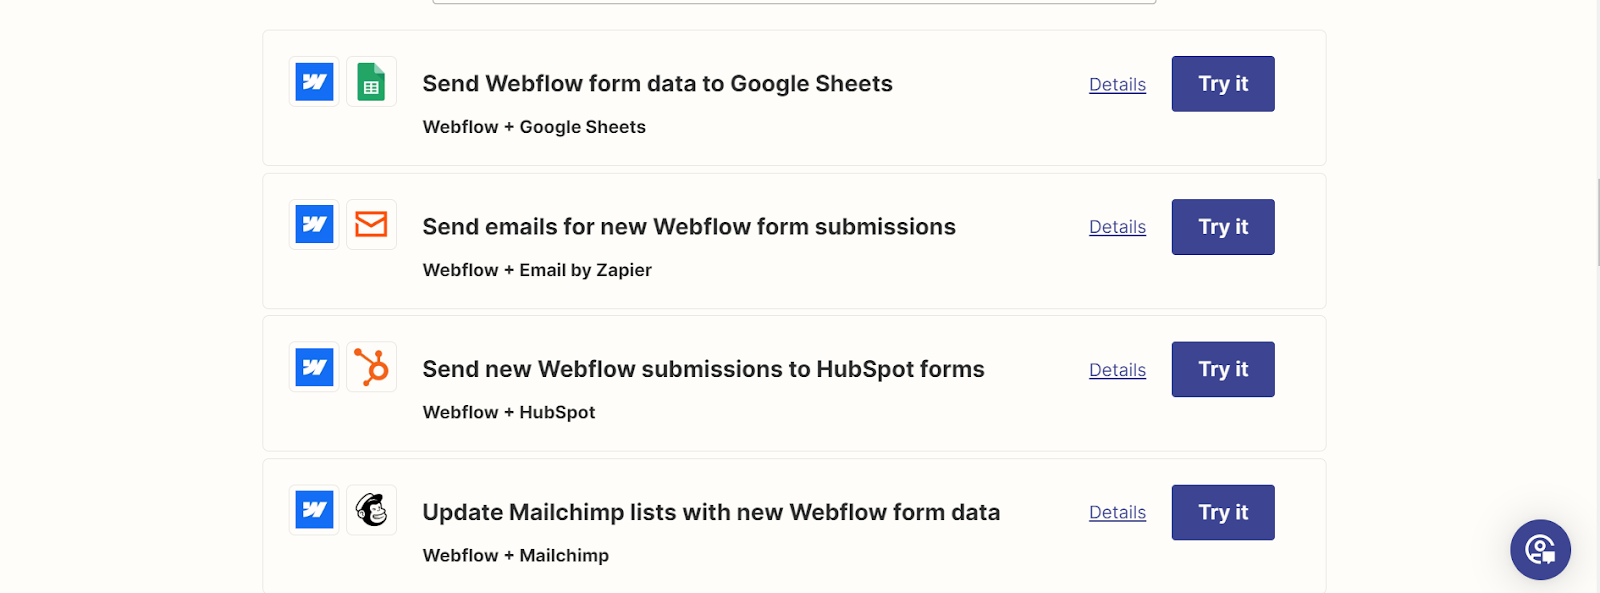
Here are some popular workflows that users can automate with Webflow and Zapier:
- Form submissions to Google Sheets: Automatically add new Webflow form submissions to a Google Sheets spreadsheet for easy data management.
- Email notifications: Send an email notification via Gmail or another email service whenever a new form is submitted or a new CMS item is created.
- Slack notifications: Receive a Slack message in a specific channel when there are updates on your Webflow site, such as new form submissions or product sales.
- CRM updates: Automatically update your CRM (Customer Relationship Management) system with new leads or customer information collected through Webflow forms.
Advanced Tips and Tricks for Webflow and Zapier Integration
Customizing Zaps for Complex Workflows
While basic Zaps are straightforward, you can customize them for more complex workflows:
- Conditional logic: Use Zapier's built-in filters and paths to add conditional logic to your Zaps, allowing different actions based on specific criteria.
- Multi-step Zaps: Create Zaps with multiple steps to perform a series of actions in sequence, such as updating a database, sending an email, and posting a message on Slack.
- Zap templates: Utilize pre-built Zap templates for common workflows to save time and effort.
Using Webhooks for Real-Time Data Integration
For advanced users, Webhooks provide real-time data integration:
- Webhooks in Webflow: Set up Webhooks in Webflow to send real-time data to Zapier or other apps whenever specific events occur on your site.
- Webhooks in Zapier: Use Webhooks as triggers or actions in Zapier to integrate with apps that support Webhooks but are not directly supported by Zapier.
Leveraging Multi-Step Zaps for Comprehensive Automation
Multi-step Zaps allow for comprehensive automation by chaining multiple actions together:
- Example Workflow: A new form submission in Webflow triggers an update in Google Sheets, sends an email notification, and posts a message in Slack.
- Streamlining Processes: Use multi-step Zaps to streamline complex processes involving multiple apps and data sources.
Real-World Use Cases of Webflow-Zapier Integrations
The true power of Webflow and Zapier becomes evident when applied to real-world scenarios. Here are some examples of how businesses are using this integration to streamline their operations:
- E-commerce Automation: An online store uses Webflow for its website and integrates with Zapier to automatically update inventory levels, send order confirmation emails, and update its CRM with customer information.
- Content Management: A content marketing agency uses Webflow to manage its website and integrates with Zapier to automate content scheduling, social media posting, and client reporting.
- Event Management: An event planning company uses Webflow for event registrations and integrates with Zapier to automate attendee communication, manage event logistics, and update their CRM.
Troubleshooting and Best Practices
Common Issues and How to Resolve Them
While integrating Webflow with Zapier is generally straightforward, you may encounter some common issues:
- Authentication errors: Ensure your Webflow and Zapier accounts are properly connected and authorized.
- Data formatting issues: Check that data formats match between Webflow and the connected apps to avoid errors.
- Zap triggers not firing: Verify that the trigger event is correctly set up and that there is new data to trigger the Zap.
Best Practices for Seamless Integration
Follow these best practices to ensure a smooth integration:
- Test Zaps thoroughly: Before activating a Zap, run multiple tests to ensure it works as expected.
- Document workflows: Keep detailed documentation of your Zaps and workflows for easy reference and troubleshooting.
- Monitor Zaps regularly: Regularly check your Zaps to ensure they are functioning correctly and make adjustments as needed.
Keeping Your Integrations Secure
Security is paramount when integrating Webflow with Zapier:
- Use secure connections: Ensure all connections between Webflow, Zapier, and other apps are secure and encrypted.
- Limit access: Only grant access to necessary accounts and restrict permissions to minimize security risks.
- Regular updates: Keep all connected apps and platforms updated to the latest versions to avoid vulnerabilities.
Future Trends: The Evolution of Webflow and Zapier Integration
The Growing Importance of No-Code Solutions
No-code solutions like Webflow and Zapier are becoming increasingly important:
- Accessibility: No-code tools democratize web development and automation, making them accessible to non-technical users.
- Rapid Prototyping: Quickly create and test new ideas without extensive development resources.
- Scalability: Easily scale your projects and workflows as your needs grow.
Predictions for the Future of Webflow and Zapier
As no-code solutions continue to evolve, expect to see:
- Enhanced integrations: More seamless and powerful integrations between Webflow, Zapier, and other platforms.
- AI-driven automation: The incorporation of AI and machine learning to further streamline and enhance automation workflows.
- Increased customization: Greater customization options for building complex and tailored workflows.
Staying Ahead with Continuous Learning and Adaptation
To stay ahead in the evolving landscape of web development and automation:
- Keep learning: Regularly update your skills and knowledge of Webflow, Zapier, and related technologies.
- Experiment and innovate: Continuously explore new ways to automate and improve your workflows.
- Engage with the community: Join Webflow and Zapier communities to share knowledge, gain insights, and stay informed about the latest trends and updates.
Conclusion
Integrating Webflow with Zapier is a transformative approach to enhancing your web development and business processes. It is necessary for those seeking to harness the full potential of their web development and business automation capabilities. This powerful synergy transforms how we manage, automate, and scale our online presence, enabling us to stay ahead in a competitive market. By leveraging the power of automation, you can save time, reduce errors, and focus on what truly matters — creating exceptional web experiences and driving your business forward.
This integration reduces manual tasks, minimizes errors, and enhances productivity. Imagine a world where your form submissions automatically update your CRM, your e-commerce sales trigger personalized customer follow-ups, and your content management system dynamically syncs with your social media platforms. This level of automation allows you to focus on strategic growth and creative endeavors, rather than getting bogged down by repetitive tasks.
The true power of Webflow and Zapier lies in their ability to connect thousands of applications, creating a cohesive digital ecosystem tailored to your unique needs. Whether you're a web designer, developer, business owner, or marketer, this integration offers unparalleled flexibility and efficiency, ensuring your operations run smoothly and effectively.
Furthermore, as we move towards a no-code future, the accessibility and scalability provided by Webflow and Zapier empower users of all technical levels to innovate and iterate rapidly. Integrating Webflow with Zapier is a strategic investment in your digital infrastructure. It not only optimizes your current workflows but also sets the stage for future growth and innovation. The future of web development and business automation is here, and it begins with the powerful combination of Webflow and Zapier.
Discover My Latest Blog Posts
Explore collection of informative and engaging blog posts.

